Please note: you can find a more up to date version of this blog at http://blog.neilennis.com

Monday, January 30, 2012

Review: Magellan Explorist 610

Read More

The good folks at Mitac Australia recently lent me a Magellan Explorist 610 for review. The 610 is described by Magellan as “a touch-screen product, with customisable hard buttons, a 3-axis compass and altimeter, camera to take geotagged photos and a micro SD card for an expandable memory of 32 GB”.


The model I received was from the USA. It came pre-loaded with hundreds of U.S. Geocaches. I’m assuming that when the Australian version is released it will come pre-loaded with Aussie Geocaches which should be great for Geocaching fans.


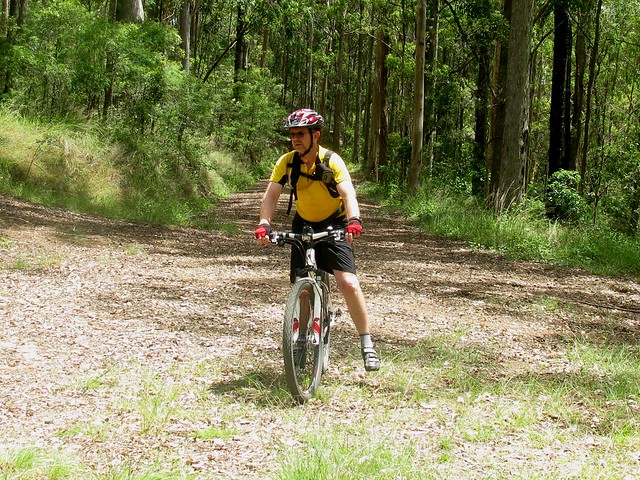
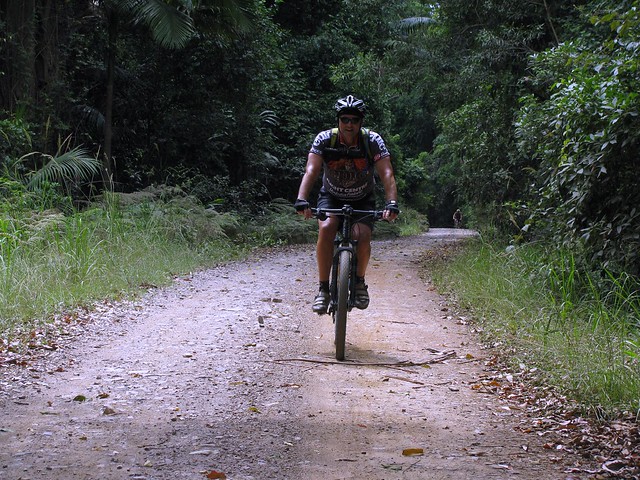
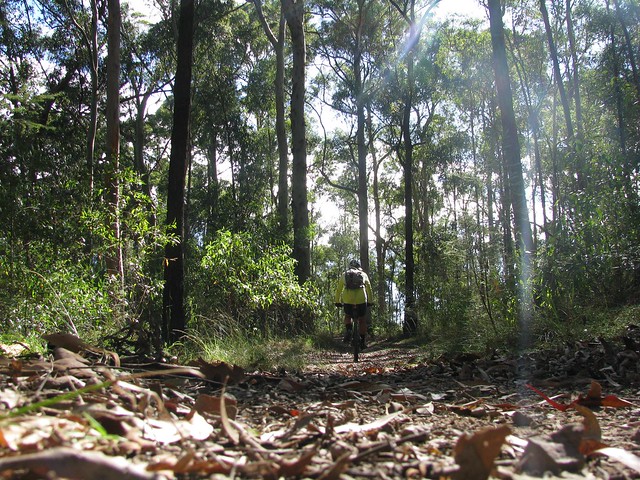
I should point out at the start that I’m a mountain biker who sometimes does a bit of Geocaching. So a primary concern for me is how usable a GPS is on the bike. I mentioned this to Mitac Australia, and they kindly sent me a handlebar mount for the GPS so I could take it on rides.


What do I like about this GPS?


1. Tough. The 610 is build from sturdy moulded plastic. It feels solid, and I’m quite confident it could take a pounding on the trail. The display feels like it’s built to last. For anyone who currently uses a smart phone for on-the-trail navigation, you’ll be much more confident exposing the Explorist 610 to the rigours of outdoor life than your much more delicate phone.


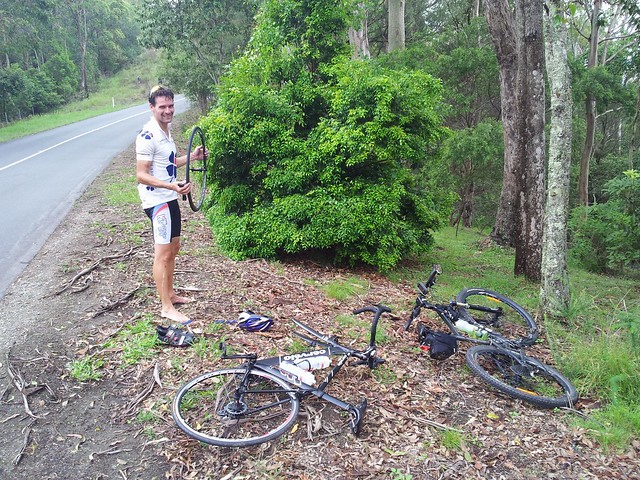
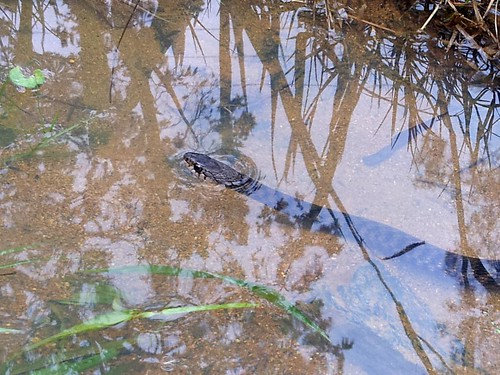
2. Waterproof. Flooded creeks and rain aren’t a problem for the 610.


3. Maps. The contour maps give you a great idea of the steepness of the terrain. It seems to have a complete set of the suburban roads in my area, so it’s handy for navigating around local streets. You can set the view to be either 2D or 3D which gives you a different perspective of the lay of the land, and comes in handy when you’re up in the hills and want to get an idea of how steep the land is around you.


4. Camera. The 3.2 megapixel auto-focus camera is easy to use. One of the buttons on the case of the unit is pre-programmed to activate the camera, so it’s really easy to point the 610 at something interesting, and quickly take a photo. You can also take videos. What I really like is being able to take photos even when it’s raining. Who in their right mind would get out their mobile phone, or digital camera in the middle of a rain storm? By making the 610 waterproof AND putting a camera in it, you effectively have an all-weather waterproof camera. How cool is that?


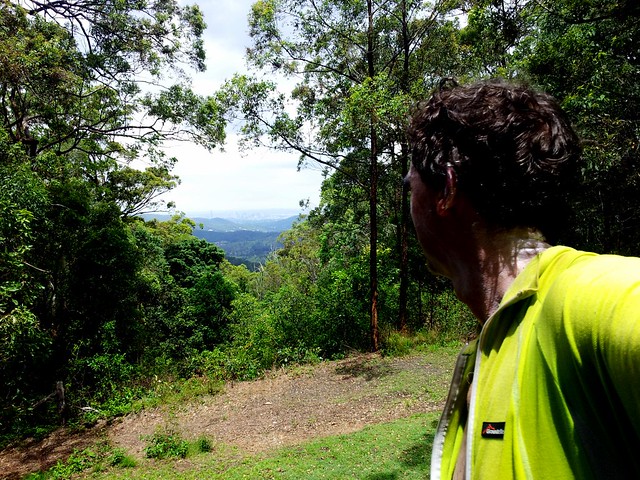
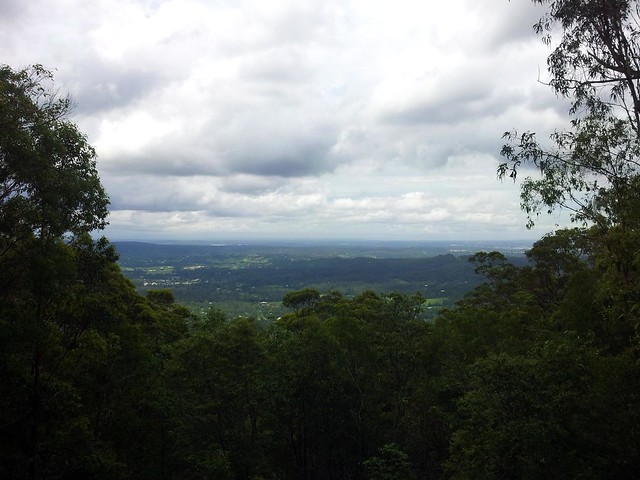
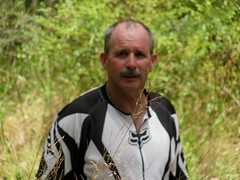
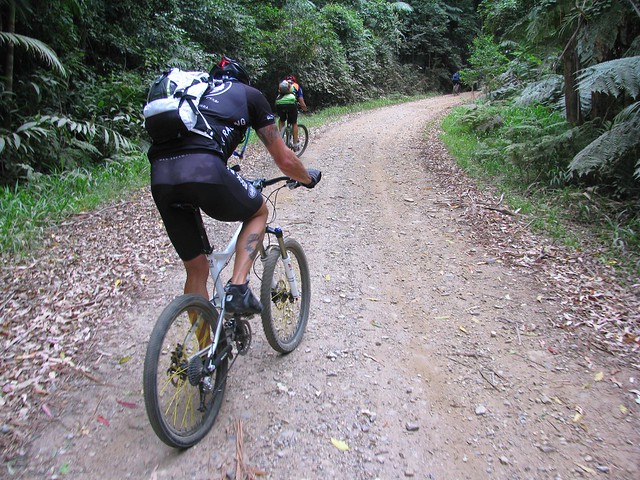
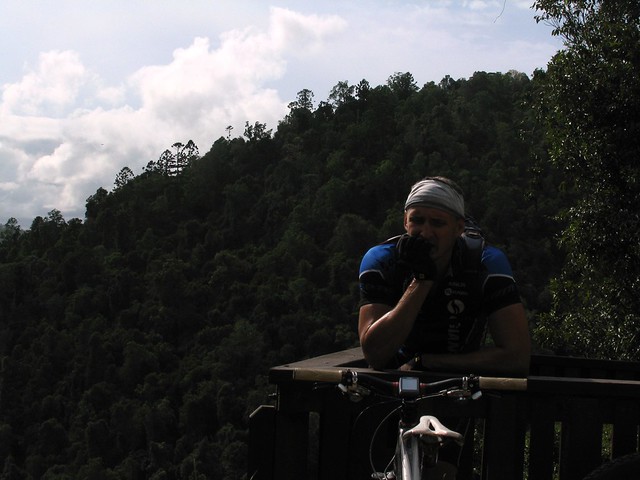
Here’s a comparison of photos taken with the Explorist 610 (on the left) compared with the same shots taken on my Samsung Galaxy S2 smart phone (on the right). I think the 610 does pretty well considering it has less than half the resolution of the SG2:


Explorist 610 (3.2 megapixel)Samsung Galaxy SG2 (8 megapixel)

5. Touch Screen. One of the fears a cyclist has of a touch screen is how easy it will be to use with gloves. This screen seemed to respond to my requests accurately, even though I was wearing full-length Fox Dirtpaw gloves. It was easy to use with gloved hands, and the menu navigation seemed quite intuitive.


What don’t I like about this GPS?


1. Batteries.


You need to put batteries into the 610. It’s NOT one of those units you just plug in via USB at the end of the day and wait to recharge. You have to open it up and put batteries in it. The manufacturers recommend two AA Lithium batteries which they say will last about 16 hours. I got considerably less than this with the two Lithium batteries I used, but I’m willing to blame this on the batteries, not the unit. You can also use rechargeable batteries, but not cheap ones. You must use heavy duty rechargeables – the sort you’d put into a hungry digital camera. When using good rechargeables I was able to use the 610 for most of a day without the batteries dying.


A pair of AA lithium batteries will set you back about $AUD 10. I spend about 12 to 15 hours per week on the bike, so I would need to purchase batteries almost weekly, which doesn’t make sense for me. One major improvement the manufacturers could make make to the Explorist 610 would be to let you recharge it by plugging it via USB. Competitor products do this alreday. I think it’s essential.


2. How do I get the software?


The Vantagepoint software is great. The problem is that when you get the unit out of the box, there’s nothing to point you in the right direction and tell you that you need to go to http://www.magellangps.com/VantagePoint to download the software. And there’s no CD. As a new buyer how do you even know there is a thing called Vantagepoint? The box tells you to go to http://magellangps.com/support from where you can download manuals for Vantagepoint, but there’s nothing to tell you how to download the actual software. Thankfully Google pointed me in the right direction.


Incidentally, I mean it, the Vantagepoint software is really cool – it allows you to easily transfer tracks, routes, and media between the unit and your computer.


3. Resetting / Not Resetting Track logs.


This has to be the most frustrating issue with the 610.


Most people who go out exploring with a GPS would like that GPS to record their adventures – this makes it easier to brag to your friends about the wonderful places you’ve been. After your journey, you come home, plug in the GPS, download your adventures and you’re ready for the next adventure.


The problem is you’re not.


The next time you go out with your GPS and turn it on, it appends to your previous track by default. So if one day you’re hiking in the Gold Coast hinterland, and the next day you’re mountain biking in D’Aguilar National Park, the 610 doesn’t automatically split then into separate tracks – even though you might have downloaded your first hike onto the computer before starting your second adventure. So at the end of your subsequent adventures, you discover that you don’t have a track log of your outing, you’ve got a breadcrumb trail going all over the countryside spanning multiple adventures.


The trick is you have to manually tell the 610 to save one track, then clear the track log and start a new one.


If you don’t remember to do this before each new outing, you won’t get the track log you expected.


But wait… there’s more! Suppose, during your hike or ride, you decide you’d like to find a Geocache. So you navigate to the Geocache section, pick a particular cache, and tell the 610 to take you to it. The problem is the unit will then cancel your current track. If you wanted to search for several Geocaches, your log for the day would be split into several different fragments.


So on the one hand the 610 doesn’t split the track log when you’d expect it to, but it DOES split the track log when you don’t expect it to.


A simple solution would be to automatically split the log after an upload via Vantagepopint, or after several hours of inactivity. And to allow searching for Geocaches without breaking the track log.


4. Seeing nearby Geocaches.


Having a pre-loaded database of Geocaches is a great advantage and a big plus for the Explorist 610.


The problem is that while using the unit, you have no idea that there might be a Geocache nearby. On most GPS units I’ve used, you put the Geocache details in as a waypoint, then whenever you’re in the vicinity of the waypoint it appears on the GPS map screen. This encourages serendipity. You’re out hiking and you see a cache on the map and think to yourself “Hey, there’s a Geocache nearby. Let’s do it!”.


On the Explorist 610, if you want to find a Geocache, you have to navigate to the Geocache section of the menu, and select the Geocache you’d like to find. Unless you do that, you could be looking at your map screen, and since you haven’t asked for it, you’d be totally unaware that a geocache was only 10 or 15 metres away.


What use is a huge on-board database of Geocaches if the unit doesn’t let you know they’re close by when you’re navigating somewhere else?


5. Bike Mount.


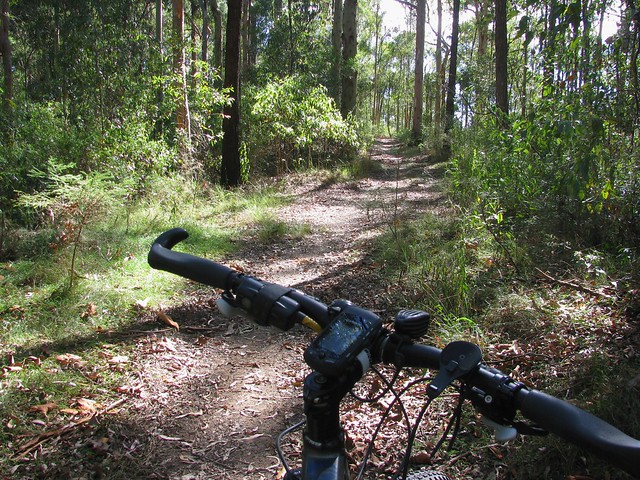
It’s great being able to mount the GPS on my bike handlebars.


But (most?) handlebars are tapered. In otherwords they’re narrower at one part than they are at another part. The handlebar mount is attached via zip-ties. The problem is when you tighten the zip-ties to fix the mount to the bars, they squeeze on the tapered bars and push the mount sideways. So the handlebar mount inevitably loosens up after a few minutes of bumpy riding, and the GPS unit slides downwards to face the ground, making it unuseable.


The work-around is to put the handlebar mount on the stem rather than the bars and twist the GPS connecter 90 degrees. But this is not always possible. Some stems are flat which means the handlebar mount doesn’t fit as snugly.


The problem is compounded by the fact that the GPS is fairly heavy, and it’s not mounted at its center of gravity. So the weight of the GPS pulls down on the mount, which causes the unit to slip around and face the ground.


There’s a missed opportunity here. If the GPS was mounted closer to its center of gravity, the on-board camera would sit higher above the bars. This means it would be easy to use the unit to take videos while riding the bike. Since it has reasonably good resolution for video, and it’s waterproof, it would be ideal for this purpose. I admit it’s a left-field idea, but you can’t do it with the current handlebar mount because the camera doesn’t sit high enough above the bars, so the handlebars get in the way of any video / pictures taken while the unit is mounted.


6. Planning Routes.


Anyone interested in exploring our wonderful world with a GPS will eventually want to enter a route into the GPS so they know where they’re going.


The Vantagepoint software lets you do this, but it only lets you set a maximum of 100 points. This might be ok for a short walk in the forest, but for a 50km to 100km adventure in the mountains, it’s nowhere near enough.


Thankfully there is a workaround. Basically you create your route in Google Earth, convert it to a GPX file (using something like http://GPSies.com) then load it into the GPS as a track. It then appears in the GPS as somewhere you’ve been before, and you can load the track to assist you with navigation.


7. Map colors.


Personally, I find the map colors difficult to read while riding the bike. It’s much easier to read maps that have a light background and dark tracks rather than the current configuration on the 610 which shows light tracks on a dark background.


The screen is nice and bright, the colors are vibrant, but in bright sunlight when you’re shooting down a trail at 40km/hr, it’s hard to get a quick glace of the screen and quickly know what’s going on.


8. Weight.


At first I wondered why the unit didn’t come with a lanyard so you could carry it around your neck. The I realized it would be pretty uncomfortable on a long hike having a 200 gram GPS dangling from your neck for several hours. I think when Magellan say “Hand Held” they really mean it. When you don’t want to hold the unit it might be more comfortable carrying it in a large pocket rather than letting it swing from a lanyard.


Bottom Line


I don’t think a cross-country mountain biker was the best match to test drive the Explorist 610 :) It’s definitely not the sort of GPS you’d put on your bike if you planned on disappearing into the mountains for a few days. And it’s not a GPS you’d use as an everyday device to faithfully and effortlessly track your rides.


But, this is a rugged GPS that comes pre-loaded with hundreds of Geocaches. It can take photos and videos while you’re outside exploring – even in the most inclement weather. It’s easy to use. I think it would be great for an afternoon of family Geocaching, or for an occasional trip out into the hills.


If you purchase one, make sure you buy some good rechargeable batteries!


Friday, January 27, 2012

Australia Day

Read More

Camp Mountain Lookout

Australia Day this year was an ideal opportunity for me to get out of the house after all the rain rain and take a nice long ride on the bike to think about what this country means to me.


On the way, I got to enjoy some great trails at Bunyaville, Ironbark, Camp Mountain, D’Aguilar National Park, Samford Pony Trails and finally, Clear Mountain. I stuck to fire trails, so most of the ride was ok despite the recent rain.


It was great to meet up with my mate Graham who was riding with Jack along the Lanita Road Rail Trail. While I was there, I took a few minutes out to find a Geocache that was just a few metres off the track. If you like exploring, and the thrill of a treasure hunt, you might really enjoy Geocaching.

Before the Climb

The steep climb up the short side of Camp Mountain is always hard work. The wet ground was softer than usual which made it even harder. I took a quick break before starting the climb to catch my breath and appreciate the beauty of the place.

Camp Mountain Lookout

14 minutes later I was at the top gasping for breath, and feeling slightly smug that I’d nailed the hill. Even though my time was almost double the fastest time anyone has done that climb. Legend has it that someone did it in about seven minutes.


The views out to Brisbane were spectacular.

Camp Mountain Lookout

There are some great views out to Moreton Island as well.


From there, the plan was to head up to Scrub Road and spend a while down in D’Aguilar National Park before heading home via Mt Nebo.

Mike

But I met Mike instead. He had two flat tyres, and only one spare tube. My big fat spare tubes wouldn’t have been much help to him, but I did have a patch kit, so I stopped and help him patch up his tubes. Since I’m not very fast at on-the-run repairs, this chewed up a bit more time than I planned, so I abandoned my plans for Scrub Road and just followed the bitumen to Mt Nebo instead.


From there it was a quick run down the Goat Track where I met Brock, a mountain biker who is lucky enough to live in Mount Nebo. The Goat Track is looking pretty rough at the moment. The rain has worn a lot of ruts in the track and some of the precipitous edges are looking dangerously soft.

Freshwater / Keelback SnakeFreshwater / Keelback Snake

Rather than head into Samford, I followed the Pony Trails up to Gibbons Road, and came across this little Keelback (or Freshwater) snake chilling out in a puddle. They’re not venomous, but one really cool thing about them is that they eat cane toads. Unfortunately they like living around creeks and swamps, which land developers seem to enjoy clearing. Interesting to think that Land Developers and Cane Toads are on the same side :)


So on Australia Day, I am grateful. This place is beautiful. We have some spectacular scenery and amazing animals. And the people are great. I can stop by the side of the road and say “G’day” to people I’ve never met before and become friends right away. And I won’t even start on how good our health and education systems are (even though we complain about their shortcomings).


We’re still the lucky country.


But on Australia Day I’m also uneasy. I think about what we’ve lost, and what we’re losing. I can’t imagine what it would be like to be an indigenous Australian and slowly watch my country taken away from me, with forests cleared, animals forced to the brink of extinction, huge quarries and open cut mines, and a massive increase in population.


I don’t have any easy answers, but I intend to keep on exploring it and enjoying it.


And I hope we can fully appreciate what we have, and care for it.


All up, this was a 75km ride, with about 1,450m of ascent, and about 4,300kcal of energy. I started running short of water near Mt Nebo, so next time I plan to take some water purifying tablets to make it easier to take on extra water at the emergency tanks in the forest, or in some of the cleaner creeks. Next time I hope to do a similar route, but add in Scrub Road.


This one deserves 9 out of 10 on the tough-o-meter because of the distance, and the tough slog up Camp Mountain in the soggy, strength-sapping dirt.


Sunday, January 22, 2012

Taylors Break

Read More

Cabbage Tree Range Road

I enjoyed last week’s solo ride down Taylors Break in D’Aguilar National Park, so I wanted to share it with a few friends. About 20 of us set off from Samford, following the Pony Trails to the bottom of Mount Nebo.

At the summitAt the summit

The ride consisted of two big 500m climbs. The first one was up the Goat Track, then along a fire trail to the Lookout at the Summit of Mount Nebo.

Andrew chills outDoes it bite?

From the summit we followed Hammermeister Road to the top of Taylors Break. But before starting that steep descent, a few riders took a detour into town to get some more water (it was a hot humid day), while the rest of us lazed around in the shade catching out breath.

I'm ok

Taylors Break is a lot of fun to ride down. The narrow track flows beautifully as it goes down the mountain. Unfortunately, towards the bottom it gets steep and slippery. Darb took a jump into the air over one of the water bars. While he was in the air, a stick went through his front spokes. As he hit the ground his front wheel slid out from under him, and he ended up on the ground. It looked painful, but Darb’s made of tough stuff, and after a few minutes he was ok and ready to keep going.

Steep Descent

Tim approaches one of the steep sections of the track. Once you go over the edge, it’s pretty much a controlled skid to the bottom. There’s no stopping – you just have to keep your front wheel straight and try to stay on the bike.

Caught with his pants down

Andrew also had a crash on the way down, and suffered a nasty bruise on his thigh (that photo is censored). He decided to strip off and wash his injuries in the creek at the bottom of the descent. Unfortunately, while he had all his gear off, Becca came round the corner. Both of them got a nasty fright, and poor Andrew had to hastily get his gear back on.


There are lots of inviting, quiet creeks like this down the bottom end of D’Aguilar National Park.

Cabbage Tree Range Road

Once we reached the bottom, there was no way to go but up. Cabbage Tree Range Road was the second major climb of the ride, also rising about 500m. It takes about an hour to climb, and by the time we got to the top we were all feeling pretty tired…

Tim

…except for Tim who (amazingly) rode the whole climb in middle ring. For those who don’t ride mountain bikes, it has three cogs on the front to make riding easier: A big ring for going fast on roads, a middle ring for moderate terrain that requires a bit of effort, and a small (“granny”) ring for steep hills and narrow winding technical sections. It takes a lot of strength to nail a long steep climb like this using the middle ring.

Brian makes it to the topRussel makes it to the top

Tim had a long wait while the rest of us mere mortals completed the climb.

Brian under the tap

Becca under the tapDarb and GeoffChilling by the water tankNeil BPaul

The best thing about the climb up Cabbage Tree Range Road is the water tower at the top. Most of us had a delightful soak under the tap to cool off.


Adam took some great photos as well which you can view here.

Andrew also took some great photos which you can view here.


The ride was 52km with about 1,500m of vertical ascent. I burned up about 3,600 kcal. Because of the heat and humidity I rate it 9.5 out of 10 on the tough-o-meter.


Thanks so much to everyone who came on the ride. It’s a lot of fun being able to do rides like this in a group. Everyone had to work really hard. Some people were totally exhausted by the end. I think everyone enjoyed themselves.


Saturday, January 14, 2012

Booloumba Falls

Read More

Booloumba Falls

Booloumba Falls is a beautiful place in the state forest near Kenilworth, about 90 minutes drive north-west of Brisbane in the Conondale Ranges. Today I visted there with seven friends from MTBDirt.com as part of a ride organized by Eric.

Pedro

We started the ride from Charlie Moreland Camping Ground, near Cambroon, and immediately started a long 12km climb which lifted us about 500m into the state forest.

Geoff

Because we had people of variety of different abilities in the group, including some seasoned mountain bike racers, we stopped regularly to allow everyone to regroup. This way no one got left behind, and everyone had a fun ride.

Ron

Eric warned us that the initial climb would be a long one, which we were all prepared for. But I don’t think we fully understood what he meant when he talked about a few “negative downhills” which made us work a bit harder as the terrain continued upwards and downwards as we rode along the ridgeline of the range.

Paul

We had to cross creeks half a dozen times or more. Some of them were over causeways like this one, but some were wet fords which meant we had to keep our wits about us to make sure we didn’t get our feet wet.

It's Cold!

The falls themselves were really enjoyable. We parked our bikes at the top of the hill, trudged a few hundred hot and sweatty metres through the bush, then jumped into a freezing cold pool under a waterfall.

Natural Jacuzzi

Some of us enjoyed a natural “jacuzzi” made by water splashing in a rock pool above the falls.

Murray

Some of us just chilled out on the edge of the water.

Booloumba Falls Lookout

The falls are up quite high (around 600m above sea level), so there are great views of the surrounding mountains.

Lookout

It was a great day, with some really impressive scenery, and fun company. Eric and his wife Berny looked after us really well, providing a support vehicle, cold drinks, and home cooked food. This was a tough ride, but it was fun because of their care, and the great company of an awesome bunch of friends.


This ride was just under 40km with a moving time of just under 3 hours, and about 3,500 kcal. If you’re doing it by yourself without a support vehicle, I’d rate it 9.5 out of 10 on the tough-o-meter. If you’re lucky enough to have a support vehicle, and friends like Eric and Berny, the ride is still hard, but I’d rate it 8.5.


Wednesday, January 11, 2012

Taylors Break

Read More

Taylors Break

The heat and humidity in Brisbane has been intense over the last few days, so I thought I’d escape the intensity by heading up into the mountains to my favourite place – D’Aguilar National Park. Today I wanted to try something a bit different, so I decided to have a go riding down Taylors Break.


Taylors Break

Taylors break is a narrow winding track that heads down the other side of the Mountain Range starting at Forestry Road and ending at Branch Creek.

Taylors Break

It starts pleasantly, covered with thick forest, opening up into great views. But as you get further along the track it gets steeper and rockier. Some places are really difficult to even walk down without sliding. Since I was travelling alone, I decided not to take risks, and walked the bike down a couple of the really steep rocky bits.

Dundas Road

Once I arrived at the bottom I faced a tough climb up Cabbage Tree Range Road, which ascends almost 500m in just under 7km to Dundas Road. Today it only took me 57 minutes, which is my best effort. As a reward, I shed my jersey, stuck my head under the tap on the water tank and let the water cool me down. I then stood in the breeze like a maniac and enjoyed its delicious coolness. Thankfully no one was watching :)


It was only 25km, but I climbed just under 1,000m on a day with a maximum temperature of 37C. It was hard work, plus the descent was quite tricky. I’ll give it 9 out of 10 on the tough-o-meter. Deduct 1 if you’re doing it in the cooler months.


The cool shower under the Dundas Road water tower ranks as one of those things you must do to appreciate how wonderful it feels.


Friday, January 06, 2012

Mt Nebo

Read More

Lanita Road Rail Trail

Lanita Road Rail TrailLanita Road Rail TrailLanita Road Rail TrailLanita Road Rail TrailLanita Road Rail TrailLanita Road Rail Trail


A few days ago I went to the MTBDirt.com website and asked if anyone would like to come on a ride today from Ferny Grove to Mount Nebo. This morning, 14 of us set off along the Lanita Road Rail Trail on our way to Mount Nebo.


Poiny Trails

Poiny TrailsPoiny TrailsPoiny TrailsPoiny TrailsPoiny TrailsPoiny Trails

Poiny TrailsPoiny TrailsPoiny TrailsPoiny TrailsPoiny TrailsPoiny Trails


Rather than just head straight for Mount Nebo, we explored some of the many pony trails that meander around Samford Valley. They’re a bit like a blend between fire trails and country lanes, with a few rocky pinch climbs, and even one or two horses. For small distances they’re really pleasant and a lot of fun. But at the end of a long ride, or over large distances they can be quite tiring, so the trick is to use them early in the ride, and to not over-do it.


Maintenance on the Trail


In a large group of people, it’s always a possibility that something will break (like it did today) so we made sure that there were plenty of opportunities for everyone to stop, have a break, and make sure everything on the bike was running smoothly.


Yuck! Mud!Yuck! Mud!


We also had to slow down for obstacles like creek crossings and deceptively deep mud puddles.


Tough Climb

Tough ClimbTough ClimbTough Climb


Climbing the Goat Track was a challenge for a large group. Everyone has different climbing ability, and some people had to work really hard to complete the climb. We had a rest at the top of the climb to let everyone recover. The most inspiring performances aren’t from people who break world records, but from those who persevere at the boundaries of their ability…. and don’t give up.


Boombanas Cafe


We stopped at Boombana’s Cafe at the top for a break and a bite to eat.


Goat Track Downhill

Goat Track DownhillGoat Track DownhillGoat Track DownhillGoat Track DownhillGoat Track Downhill

Goat Track DownhillGoat Track DownhillGoat Track Downhill


We then had a quick downhill run down the Goat Track. It’s much easier to go down that to climb up :)


Rail Trail

Rail TrailRail TrailRail Trail


After a quick roll along the bitumen, we headed back along another part of the Rail Trail which is now used as a cow paddock.


We rode about 50km with about 1,250m of vertical ascent.


I started from home in Lawnton, so all up I rode about 85km with 1,380m vertical ascent.


No tough-o-meter today. The ride was different for each person. Some found it more difficult than others. What impressed me was that everyone was patient, and we all rode together. It was a great day with some great people.